In the following post I will explain and describe the steps
needed for create, sign and install a certificate on Cisco WLC controller for
web authentication portal.
In general the process goes like this:
1.
You create a CSR and send
it to a 3rd party CA for signing
2.
The CA returns two
certificates: device and server
3.
You use a private key along
with the CA certificates to create the final certificate
4.
Install the certificate on
the controller
CSR (Certificate Signing Request) - A CSR is a message that an applicant sends to a CA in order to
apply for a digital identity certificate. For the most part, a third-party CA
company, like Entrust or VeriSign, requires a CSR before the company can create
a digital certificate.
CA (Certificate Authority) – Server/company
which responsible for validate and assign certificates, few main CA are:
GoDaddy, RapidSSL, Verisign etc.
At first we will need to download
and install OpenSSL program version 0.9.6a, and if you are working on Microsoft
Windows you will need OpenSSL for windows which can be download from the
following URL:
After downloading the file, unzip it and run the setup.exe
file, follow the instructions and after the installation process ends reboot
the computer.
Now let’s begin; first step is to create a CSR:
1.
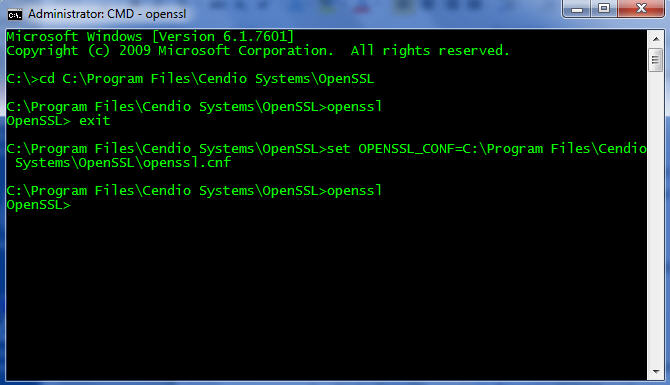
Open CMD with administrative
privilege (Start->Run, type CMD and press CTRL+SHIFT+ENTER)
2.
Go to OpenSSL working
directory (C:\>cd C:\Program
Files\Cendio Systems\OpenSSL)
3.
Type:
set
OPENSSL_CONF=C:\Program Files\Cendio Systems\OpenSSL\openssl.cnf, and
click enter
4.
Type: openssl.exe and click
enter
5.
Type: req –new –newkey rsa:2048 –nodes –keyout
mykey.pem –out myreq.pem
6.
A configuration form will appear
and you will have to type some information, the most important one is the CN
(Common Name) which must be the same as the controller host name and can be retrieved
from the controller by entering Controller->Interfaces->DNS Host Name


Process output example:
OpenSSL> req –new –newkey
rsa:2048 –nodes –keyout mykey.pem –out myreq.pem
Using configuration from
C:\Program Files\Cendio Systems\OpenSSL\openssl.cnf
Loading 'screen' into random
state - done
Generating a 2048 bit RSA
private key
...........................................+++
.............................................................+++
writing new private key to
'mykey.pem'
-----
You are about to be asked to
enter information that will be incorporated
into your certificate
request.
What you are about to enter
is what is called a Distinguished Name or a DN.
There are quite a few fields
but you can leave some blank
For some fields there will be
a default value,
If you enter '.', the field
will be left blank.
-----
Country Name (2 letter code)
[AU]:IL
State or Province Name (full
name) [Some-State]:IL
Locality Name (eg, city)
[]:TLV
Organization Name (eg,
company) [Internet Widgits Pty Ltd]:COMPANY.COM
Organizational Unit Name (eg,
section) []:IT_WiFi
Common Name (eg, YOUR name)
[]:wifi.company.com
Email Address []:
Please enter the following
'extra' attributes
to be sent with your
certificate request
A challenge password
[]:123456
An optional company name []:
OpenSSL>
|
One more important thing is to remember the
challenge password as we will need it later in the process.
7.
At the end of the process
we will find 2 new files in the OpenSSL working directory: mykey.pem and
myreq.pem. Keep the file mykey.pem in safe place along with the challenge password
and send the file myreq.pem to the CA for signing.
8.
After the CA will sign your
request he will send you back two files – root certificate and device
certificate, now we will need to join these two into one file. Open with your favorite
text editor the device certificate and copy its content to a new text file,
then open the root certificate and copy its content to the new file right below
the device certificate content.
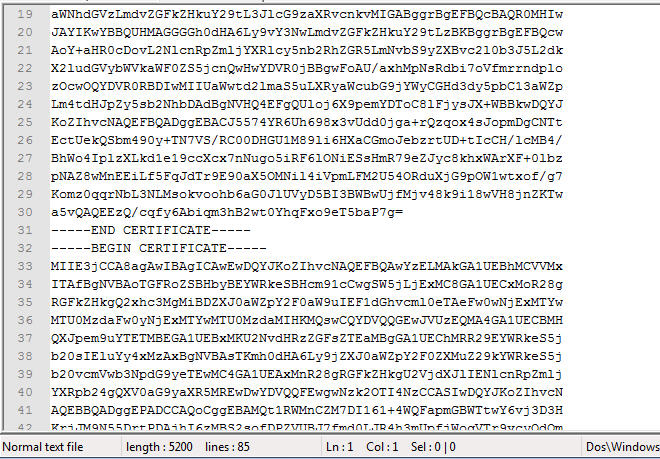
Paste certificates together in order to create one all-in-one
9.
Save the new file as all_certs.pem
10.
Copy the file all_certs.pem
to OpenSSL working directory
11.
Type: pkcs12 -export -in all_certs.pem -inkey
mykey.pem -out all_certs.p12 -clcerts -passin pass:123456 -passout pass:123456
*the
password is the one that we enter in step 6
OpenSSL> pkcs12 -export
-in all_certs.pem -inkey mykey.pem -out all_certs.p12 -c
lcerts -passin pass:123456
-passout pass:123456
Loading 'screen'
into random state - done
|
12.
Type: pkcs12 -in all_certs.p12 -out final-cert.pem
-passin pass:123456 -passout pass:123456
OpenSSL> pkcs12 -in
all_certs.p12 -out final-cert.pem -passin pass:123456 -passo
ut pass:123456
MAC verified OK
|
13.
Now we have the file final-cert.pem,
this is the file that we will install in the controller. Put the file on
computer which runs TFTP server and make sure that the controller has access to
this computer (most of the problems can be found in this stage where firewalls,
NAT and all kind of IP address issues prevent from the controller to access properly
to the TFTP server)
From here there are two ways to download the certificate to the controller: web GUI or CLI, I prefer the CLI because it gives you an error output in case there is something wrong but I will show both ways.
14.
Web GUI: enter the
controller web GUI and go to Security (1) -> Web Auth (2) -> Certificate
and check the Download SSL Certificate checkbox (3)

15.
Type in the required
information such the server IP, file name and password (from step 6), in the
end click on Apply (in the upper right corner).


16.
After the controller will
finish download the certificate he will redirect you to reboot system page to save
the configuration and reload the controller for the certificate to take effect.
17.
CLI: login into the
controller using SSH
18.
Type the following commands
with the corresponding information:
transfer download mode tftp
transfer download datatype
webauthcert
transfer download serverip <TFTP_SERVER_IP_ADDRESS>
transfer download path \
transfer download filename <FILE_NAME>
transfer download certpassword <PASSWORD>
|
19.
Type: transfer download start to start
download and install the certificate
(Cisco Controller)
>transfer download start
Mode.............................................
TFTP
Data
Type........................................ Site Cert
TFTP Server
IP................................... 172.16.0.80
TFTP Packet
Timeout.............................. 6
TFTP Max
Retries................................. 10
TFTP
Path........................................ /
TFTP Filename....................................
final-cert.pem
This may take some time.
Are you sure you want to
start? (y/N) y
TFTP Webauth cert transfer
starting.
TFTP receive complete...
Installing Certificate.
Certificate installed.
Reboot the switch to
use new certificate.
|
In the end reboot the switch by issuing the
command reset system.
In order to verify go to Security->Web Auth->Certigficate
on the controller web GUI and see the certificate details as validation dates
and type.


This seems to be the best document I have come across till date
ReplyDeleteIt is my first visit to your blog, and I am very impressed with the articles that you serve. Give adequate knowledge for me. Thank you for sharing useful material. I will be back for the more great post. 컬쳐랜드 상품권 매입
ReplyDelete